Yamaha Disklavier: 3 Best Routers to Connect Internet Wi-fi

Disclosure: Some of the links in this article may be affiliate links, which can provide compensation to me at no cost to you if you decide to purchase.
Piano Wifi Routers
Having trouble with internet connection to your piano? Piano technicians like myself commonly use these 3 routers to install internet to Yamaha Disklavier Player Pianos.
The most common reason why a Disklavier should be connected to this internet is for piano performances available on Disklavier Radio, DisklavierTV, On-Demand, MusicShop/Yamaha Musicsoft, and Remote Live for institutional use.
*If you run an internet speed test and it reads below 135mbps in the piano room, you may want to consider consulting your IT specialist to improve internet speed, reboot your home router, or buy a better home router.
What should I connect my Disklavier to the internet with?
Best 3 Yamaha Router for Disklavier Pianos
There's no such thing as a Yamaha Router, but these are 3 of the best routers for Yamaha products like Disklavier.
1. TP-Link Nano Router: Setup WiFi Bridge in "Client Mode"
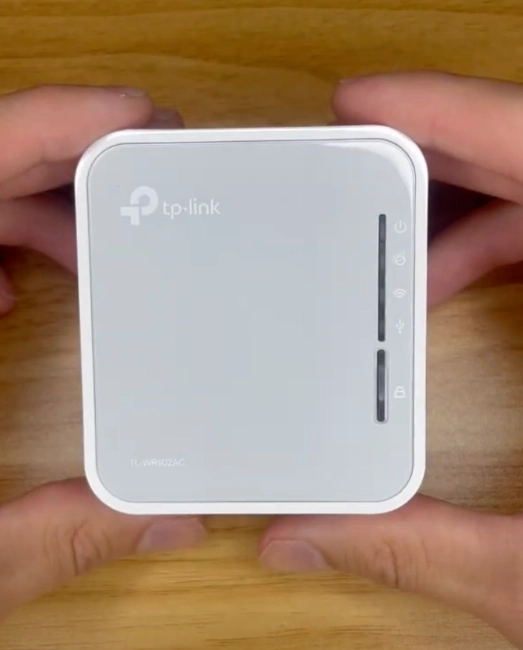
The Tp-Link Nano Router is the best way to connect all Disklavier Pianos to the internet for my service appointments.
Instructions for 'Client Mode' (which is the proper setting) setup are available in the paper instructions inside the box.
However, I have written briefly about how to quickly set it up to your home internet with pictures. Please scroll to #3A for instructions ==> 3 Best Ways to Connect a Yamaha Disklavier Piano to the Internet
N300 Router Pros and Cons
Pros:
Next best method to direct ethernet connection lan cable
Small Size
Simple solid green light indicates connected to network
Establishes a dedicated bridge for one specific device (the piano)
Cons:
It requires 8-steps to configure the software to "set it and forget it"
Requires AC outlet/power source to power the device
For this device, I use the term “hybrid” connection. This means that it connects from the piano ==> ethernet cable ==> Nano Router ==> wireless connection ==> home WiFi network of the router.
It should be manually set up in "Client mode". The picture of instructions shows that there are 8-steps to set it up in "Client Mode" which is the correct setting when establishing a connection to the piano.
The wires are tied with both zip ties and bendable clamps so that it can be removed to reach the "reset" button with a paper clip. It is also necessary to read the numerical password on the back, which is required to configure the software during setup.
The nano router's light is solid green, which means it has established internet connectivity to the home internet.
I tend to carry extra TP-Link Nano routers with me in case I ever need to install one on a piano. When a piano customer experiences internet issues, I setup one of these routers most often.
*It's important to note that it can be configured to establish a connection to a static IP address, which may be required depending on the complexity of the network.
Most home networks are not complex. In which case, the 8-step quick setup guide is all that is needed to establish a strong connection for the piano.
When the home network is complex, I recommend to contact the "IT guy" who is usually able to help set it up and/or find an available static IP address.
2. TP-Link Powerline Adapter
This "Push to Pair" router, provides the most intuitive setup.
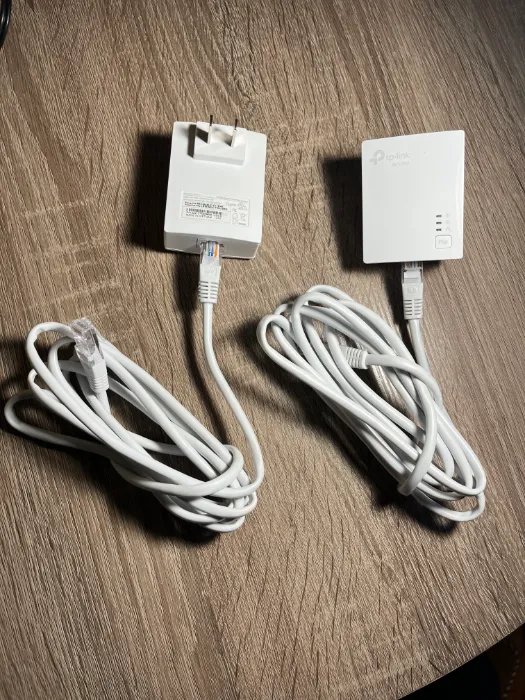
It comes with 2 identical pieces of hardware that get plugged into a power source and come with both Ethernet ports and cables. The hardware will pair to each other with a touch of a button. Push the pairing button on each router/device and then it’s paired!
Pros:
Does not require any programming
Most simple to setup
Easy to diagnose any issues with 3 green light indicators
Cons:
Requires close range
Requires relatively unobstructed path from the home router
Requires AC Power Source on both sides of setup
Requires vacant physical ethernet port from home router
This diagram simply shows that it requires both a electric power source and direct ethernet connection on both ends.
*As long as power is provided to both sides, and the home router has available ethernet jacks, this may be a preferable setup option.
3. BrosTrend AC1200 WiFi to Ethernet Adapter
Recommended by Richie Hayes, who is a leader in the field of advanced player piano technology.
The best part about this router is that it boasts of quicker internet speed than the N300 that I cited above. The device is a repeater that will go as fast as the home network is emitting of up to 1200 mbps, which is 4x faster than the Nano Router listed above.
Pros:
Better potential for high speeds exceeding 300 mbps
Cons:
Outdated interface for programming router
Possible co-channel interference with other devices connected to home network
It acts as a repeater, not just a simple bridge
The downside is that this device is technically a “repeater” that happens to be equipped with an ethernet jack that connects to the piano. The repeater frequency can’t be turned off which may interfere with other WiFi connected devices. This is due to multiple “Access Points” fighting for the same channel, which is called co-channel interference.
Risks:
*You really don’t want to make the piano better, yet walk away potentially making it worse for other client owned devices.
Related:
What's the difference? TP-Link Nano Router vs. Vonets
Can’t Connect to the Yamaha Disklavier App? Try these 15+ things
Blinking & Flashing Lights Error Guide: Yamaha Disklavier
Connect Yamaha Enspire Disklavier Piano: WPS Mode
Explained: Yamaha UD-WL01 USB Wireless Lan Adapter for Piano
Wi-Fi routers for Player Piano Systems
TP-Link Powerline Vs. Vonets: What's the Difference?
Vonets VAP11AC Wireless Wifi Router Customer Review
How to Configure TP-Link N300 Wireless Nano Router
TP-Link TL-WR802n Nano Router Customer Review
TP-Link Powerline AV1000 Adapter Customer Review
Tp-Link Nano Router vs. Vonets: What's the difference?
Static IP: How Best to Setup TP Link with Yamaha Disklavier
Yamaha Disklavier: 3 Best Routers to Connect Internet Wi-fi
Disclosure: Some of the links in this article may be affiliate links, which can provide compensation to me at no cost to you if you decide to purchase.


