How to Setup Static IP for TP Link: Yamaha Disklavier

How to connect a Disklavier to a static IP?
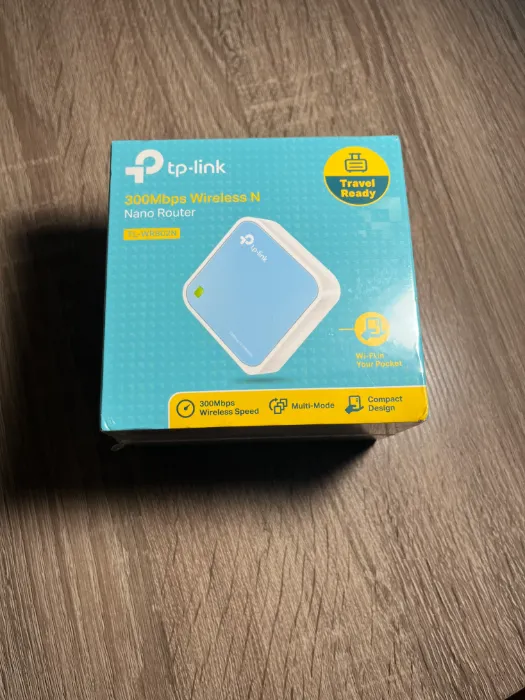
This short guide demonstrates how to connect a static IP address using the N300 Nano Router through the TP-Link website.
If you have any trouble, the best ways to connect may be to call the IT guy or follow this short guide.
It's often tricky for some piano technicians to establish a stable internet connection with Yamaha Disklavier Pianos.
*If you believe your customer has a "normal" home router, then setting up a static IP is unnecessary. Setup the Nano Router in 'Client Mode,' which can be found in the paper instructions inside the box. For a walk-through with pictures, please refer to the setup instructions in section 3A of the 3 Best Ways to Connect a Yamaha Disklavier Piano to the Internet.
If the network is a bit more complicated, see instructions below:
1. Connect the Router
Connect the router to a power source
Connect the ethernet cable to both the nano router as well as the ethernet jack on the CC unit underneath the soundboard.
2. Connect to TP-Link Wi-Fi network
Go to the settings app on your iPhone
Click "Wi-Fi"
Select TP-Link Network (SSID)
Enter in the numerical password printed on the Wi-Fi Info Card or on the product label at the bottom of your router
3. Launch http://tplinkwifi.net
Choose from Google Chrome, Firefox, or Safari etc. and launch a new tab and enter "http://tplinkwifi.net"
*Create a new password to log in.
4. Start Quick Setup
Click "Next" to start the Quick Setup
Select "Client"
Click "Next"
5. Select your preferred Wi-Fi network
Pick the Wi-Fi network you prefer (Usually the home network)
Click "Next"
*Networks are ranked by strength. Generally, it is best to connect to the strongest network, unless it becomes overcrowded.
6. Enter the Corresponding Wi-Fi Password
Type the Wi-Fi network’s password in the Password field
Click "Next."
7. Select “Static IP” for Lan type, give it an open IP Address, and confirm that the Subnet Mask and Default Gateway are correct.
To find an open IP Address, perform a ping and confirm there's no response.
Try to reach the "IT Guy" to assist with finding and entering this information
Avoid all of the addresses between 192.168.0.100 - 192.168.0.149, since that's the default DHCP range.
*That leaves the ranges from 192.168.0.2-99 and from 192.168.0.150-254 wide open, which is usually plenty for most home networks.
8. Confirm that DHCP settings are Disabled.
9. Complete the configuration
Click "Finish" to complete the configuration
and then your Ethernet-only device can access the internet.
10. Go to the Enspire Controller App
Confirm you are able to see the Piano in the iPad app
Once the piano is ON - Wait 3 Minutes and 30 seconds before expecting a successful internet connection
Now, you're all DONE!
*If, after all this the piano hasn't yet connected to the internet, proceed to #11.
11. Adjust Disklavier's Network Settings; if needed
If the Piano is unable to connect to the internet (ie. Play Disklavier Radio, On-Demand etc.), you will need to adjust the Disklavier’s network settings.
12. Select "Wired Network"
In the App, Click “Settings” ==> “Wired Network”
13. Select "Manual" DHCP
In the box that says DHCP open the drop down and select “Manual.”
14. Verify Correct IP
You can leave the IP address as long as it is in the correct network (192.168.xxx.xxx).
15. Then set the gateway, DNS1, and DNS2 (8.8.8.8).
Now, your piano should be all set!
Any questions? Contact Kevin
Related:
3 Best Ways to Connect a Yamaha Disklavier Piano to the internet
Can't Connect to the Disklavier App? Try these 15+ things
Flashing Lights Error Guide: Yamaha Disklavier


