3 Best Ways to Connect a Yamaha Disklavier Piano to the Internet

-
I. Ethernet: Direct Internet Connection for Disklavier (Recommended)
-
II. WPS: Internet Connection for Disklavier (Not Recommended)
-
III. Nano Router: Wireless Bridge Internet Connection for Disklavier (Recommended)
- Setup the Nano Router for your Disklavier Piano in 'Client Mode' in 5 steps
-
Not working?
As a Piano Technician, here are the 3 Best Ways to Connect a Yamaha Disklavier system to the internet.
I have connected 100+ Disklavier Enspire Yamaha Pianos to the internet. Here are the 3 best ways to connect a modern player piano to home internet and wifi networks.
Connection to the internet helps customers experience new music and piano performances in their living room, especially if they upgraded to a DKC-900 from a Mark IV or E3 piano system. They no longer have to deal with the floppy drive and floppy disks, which opens up a whole new world of musical possibilities.
Yamaha Disklavier: 3 Best Routers to Connect Internet Wi-Fi
Internet-connected Disklavier Pianos also provide customers with direct access to purchase music on Yamaha Musicsoft in real time. With a strong network connection, instant access to extra music outside of the built-in songs provides easier access to the songs of the finest musicians in the comfort of your own home.
I. Ethernet: Direct Internet Connection for Disklavier (Recommended)
If you don't mind looking at an extra wire, a direct connection from the Lan line coming from the wall of your home is the strongest connection available. This is also the least-complicated setup process.
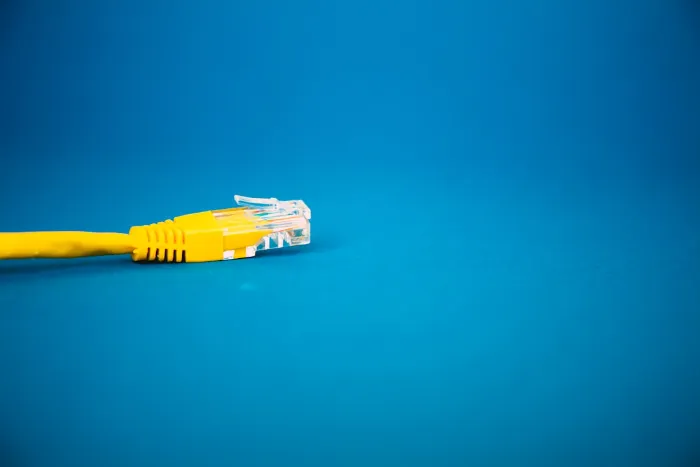
It's best to pick an ethernet cable that is at least 8ft long so that it can reach the plug in the wall.
Also, be sure to pick a color that matches, blends, or looks acceptable to the room decor.
Take zip ties and tie the Lan cable against any pre-existing wires to simplify the look of the wires coming from the piano.
Find where the ethernet jack is on the CC unit, be sure to look for the black box under the soundboard area of the piano.
So long as you can confirm that internet is running through the wall, your connection will be the strongest connection possible after it's all plugged in!
II. WPS: Internet Connection for Disklavier (Not Recommended)
Notes:
The Piano Must be in "RT" Mode (back of switchbox)
Turn off piano via app (otherwise you may have to re-establish connection each time)
*The Yamaha UD-WL 01 allows access to maintenance mode for Piano Technicians if there is no internet connection.
The UD-WL01 is a wireless transmitter is critical to establish iPhone/Android connectivity to the Disklavier Network in order to operate the app (in the absence of an internet connection*).
The Disklavier emits it’s own Wi-Fi network within a 50ft radius because of this device.
This form of connection to the internet does not always work (I have seen it work successfully 3 times!).
Typically the router has to be within the same room as the piano, and it must have a button on the router itself to enable a WPS connection and/or WPS functionality. If there is no button on the router for WPS connections, then it’s likely that you’ll be unable to setup a WPS connection.
The instructions list how to pair the UD-WL01 to a router with 3 steps
In short...
1. Insert the UD-WL01 into the USB to Device jack in the back of the switch box
2. Press and hold the WPS button on the UD-WL01 for 3 seconds
3. Press the WPS Button on your home router
All that needs to be done is to press and hold the button pictured here for 3 seconds. Meanwhile, press the WPS button on the client's router so that these two devices can "pair." It's just like someone would pair a set of bluetooth headphones to their laptop or iPhone.
Once the devices pair, you should be all set!
In Depth Article ==> Connect Yamaha Disklavier Piano: WPS Mode
Want to Learn More? ==> Explained: Yamaha UD-WL01 Wireless Lan Adapter for Piano
III. Nano Router: Wireless Bridge Internet Connection for Disklavier (Recommended)
This is my preferred method of Piano internet connection.
This connection is half wireless and half wired as you can see in the diagram below.
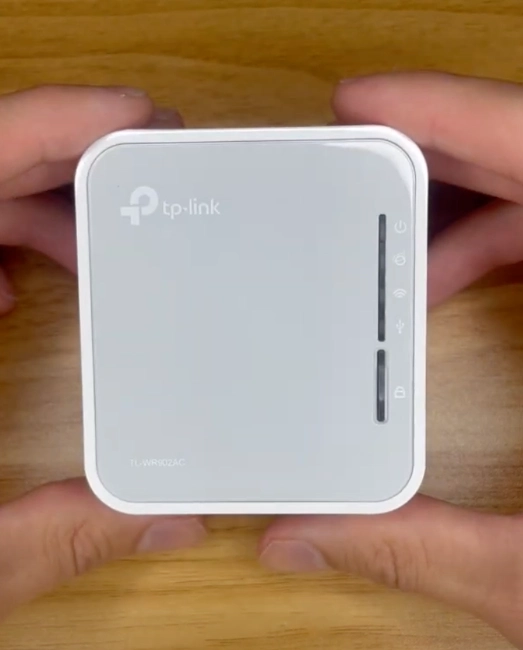
The TP-Link nano router is one of my favorite wireless bridges to use for internet connection.
Read ==> 3 Best Routers to Connect Disklavier to Internet
Setup the Nano Router for your Disklavier Piano in 'Client Mode' in 5 steps
Instructions for 'Client Mode' (which is the proper setting) setup are available in the paper instructions inside the box, which works for most networks in customer’s homes.
Step 1: Plug-in the Nano Router and ethernet cable
The N300 Nano Router (Piano Router) is mounted to the beam above the leg next to the CC Unit.
I've wrapped the ethernet cable very tightly to keep it condensed and orderly.
The Nano Router is powered by an additional extension cord that I installed because the power supply of the Piano does not always have enough AC outlets for the Router to plug into.
Step 2: Reset the TP-Link N300 Wireless Portable Nano Travel Router
After plugging everything in, reset the router.
I do this by pressing this button with a capstan tool.
Resetting is something you need to do if you...
-Entered the incorrect password
-Wireless Connections have not been established
-Piano has been moved into a new home
-New network
Step 3: Connect to TP-Link Wi-Fi network and enter 8 digit Password
In your iPhone settings, go to Wi-Fi, look for a WiFi network that starts with "TP-Link".
Then, enter the 8 digit passcode underneath the second bar code at the lower right hand side on the back of the square box.
The passcode for the TP-Link network (found in WiFi settings) for the device in this picture reads "60148186."
Step 4. Launch http://tplinkwifi.net
Choose from Google Chrome, Firefox, or Safari etc. and launch a new tab and enter "http://tplinkwifi.net" into the URL.
*Create a new password to log in.
Step 4: Software configuration of the TP-Link N300 Wireless Portable Nano Travel Router
Enter in any password
Do not get carried away with passwords because whenever the device is "reset" then it will always ask you to create a new password. I have never had to enter the password to get back into the system. I reset them all the time!
I always click "Use Strong Password" because it's quick & easy.
Continue with Quick setup by pressing "next."
Select "Client" Mode to properly configure the TP-Link
"Connect" to the strongest network you know the password to.
This screen will show you all available networks that the router can join.
It is ranked by strongest network at the top and least strongest networks at the bottom.
Choose your strongest network.
Enter in the password of that WiFi network and click "next."
*If you selected your regular home wifi, this would be the password you share with family and guests to login to the network.
Press "next," unless you need to enter in a unique static IP address that is generally only needed for higher security networks.
*If you believe the network is a bit more complicated and after already trying the instruction instructions below, please reference - Static IP: How Best to Setup TP Link with Yamaha Disklavier (Ask to contact the "IT Guy")
...9 times out of 10, pressing the "next" button will do.
Press "finish" so that the system can reboot, which may take a few minutes.
Make sure to wait until the bar loads 100% so that it reboots properly.
Once you see this screen, exit out of the browser tab and get back on your preferred home network/the network you connected to the piano.
Finally, open the Yamaha Disklavier Enspire iPhone App and test to see if you can play songs on Disklavier Radio.
Step 5: Power cycle the Disklavier (If needed)
Power the Disklavier down by pressing the power button located underneath the switchbox.
After about 15 seconds, turn it back on and you should be connected to the internet.
If that doesn't work, then you may need to configure a static IP address in the router settings so that home network does not see the Piano N300 Nano Router as a "Rogue AP." Contact the "IT guy" if they have one.
The Yamaha Disklavier is now all connected to the internet!
Once you are all connected to the internet, it may prompt the start of a software update. Depending on the strength of the internet, this can take from 5 minutes to 45 minutes.
I always test whether or not I have internet connection on these self-playing pianos by the Yamaha Piano Radio known as Disklavier Radio. These radio-type broadcasts have channels of 24-hour uninterrupted streams of music.
Here is my stash of N300 Nano Routers that I like to keep in my car.
If there is ever a Nano Router that doesn't work, I always have a couple backups.
Occasionally, there will be a customer who needs help connecting their piano to the internet who has a different router of a different brand underneath the piano. In a situation like this, I will use my preferred router because I know it's reliable and easy to setup. Routers aren't complex once you learn about how to set up.
However, if I were to learn about every new router that I encounter in the field, it would add significant time to my service visits. So, I prefer to bring my own routers.
Not working?
If you have successfully completed these steps and still cannot connect to the internet (Green light on TP-Link is solid green), you may need to connect to a Static IP Address. Learn how ==> Static IP: How Best to Setup TP-Link with Yamaha Disklavier
Routers for Connecting Pianos to the Internet
3 Best Internet Routers For Yamaha Disklavier Pianos
TP-Link Powerline Adapter AV1000 Customer Review
TP-Link N300 Nano-Router Customer Review
How To Configure TP-Link N300 Wireless Nano Router
-
I. Ethernet: Direct Internet Connection for Disklavier (Recommended)
-
II. WPS: Internet Connection for Disklavier (Not Recommended)
-
III. Nano Router: Wireless Bridge Internet Connection for Disklavier (Recommended)
- Setup the Nano Router for your Disklavier Piano in 'Client Mode' in 5 steps
-
Not working?


